In this tutorial, I'll show you how to make a black and white vector drawing from a color photo without using the Pen tool.
Step 1. Open the photo in Photoshop.
I will make a reservation right away that photographs in which the figure of a person is on a white background are suitable for completing this lesson. If you do not have one available, then before starting the lesson, the existing photo must be prepared.
Using the selection tools, separate the figure from the background and copy the selection onto new layer. Rename this layer "shape". Create a new layer, fill it with white, rename it "background". Move this layer in the layers panel so that it is below the "shape" layer. Merge the "background" layer with the "shape" layer. Rename the resulting layer to "Base".

Step 2 Next, we'll apply an Isohelium adjustment to the Base layer to get a black and white silhouette. It is quite possible that the first time you will not be able to ensure that all the details you need are visible on the silhouette. Therefore, we will make several copies of the “Base” layer so that on each, using different settings for “Isohelia”, we get a silhouette with the necessary details.
After making two or three copies of the "Base" layer, turn off their visibility. Make sure you only have the Base layer active.

Step 3 Apply (Image - Adjustment - Threshold). I used the following settings to get the base of the silhouette:


Step 4 Now we will apply a Diffusion filter to the layer to smooth out the jagged edges. Filter - Stylize - Diffusion(Filter - Stylize - Diffuse)

Now, to make the edges of the image sharper, let's go Image - Correction - Levels(Image – Adjustment – Levels), move the right and left sliders closer to the center. To make it easier to control the result, zoom in to 300% before applying the adjustment.


Again repeat the steps with the "Diffusion" filter and the "Levels" correction

Step 5 Turn on visibility for the "Base_1" layer. Apply Image - Correction - Isohelia(Image - Adjustment - Threshold).


Step 6 Repeat step 4 for the "Base _1" layer.

Step 7 Create a new layer, fill it with black, move it in the layers panel below the "Base" layer. Change the blending mode for the "Base_1" layer to " Difference(Difference). Here is what happened at this stage.


Step 8 The girl turned out to be quite ugly, but it's all fixable. Make the Base layer active, add layer mask. With the help of an eraser, we erase the “terrifying” areas on the girl’s face.

Already much better. However, in my opinion, the left eye let us down a bit.
Step 9. Turn on the visibility for the "Base_2" layer, apply Isohelia so that a clear outline of the eye appears. Repeat step 4. Using the tool " Lasso» Select the area with the eye and add a layer mask.

If you are satisfied with the result, then glue the layers.
Despite the fact that Photoshop is a raster graphics editor, some vector tools are also provided in its toolset. Vector tools are designed primarily for creating editable curves - contours. In order to refresh your memory, we recall that the difference between raster and vector graphics is in the way they are stored and described. graphic information. Vector drawings are stored in the form of mathematically described curves, which do not lose quality when scaling, and are subject to easy and flexible editing at any time. First, consider the principle of constructing vector curves.

Vector contours are built on segments that have key nodes and control points. Key nodes limit the segment from two sides, and control points allow you to control the bending of the curves.
Group tools are used to create curves Pen. Tool pen tool designed to create curves by key nodes. The principle of operation of this tool is to specify the key points of the contour segment. If, when specifying a control point, without releasing the mouse button, move it, then a segment will appear at the key point containing checkpoint. Further mouse movements already directly affect the control point, and, in turn, the bend of the segment. The next left-click will set the next control point, and so on.

The Pen tool can work in two modes - creating curves and creating so-called shapes - closed vector areas. Switching between these modes is carried out by buttons - contour creation mode, - shape creation mode. If you are working in the form creation mode, then the contour you create will always be considered closed and, as a result, filled with the color you have chosen. Physically, in the Layers palette, a layer mask is created based on the vector drawing. The layer itself is filled with the color you choose (choose the color on the properties palette).

The principle of working with a vector mask differs slightly from the principle of working with a raster mask, only the means differ. If, in the case of working with a raster mask, you changed it using drawing tools, then in this case, changing the shape of the mask occurs using vector tools.
In order to convert a vector mask to a raster one, you need to call context menu vector mask and select item Rasterize Mask. As a result, you will get a regular layer mask. Otherwise, working with a layer mask in the vector version does not differ from working in a raster version.
Vector drawings are convenient because at any time it is very convenient to change the shape of the curves of this drawing. There are a number of tools for this. For example, the tool (adding key points - nodes) - adds key points on the curve in the place where you click. The tool can remove extra points on the contour by clicking on the point to be removed. In fact, switching to these tools is not necessary at all. Pay attention to the switch Auto Add/Delete on the properties palette. If this mode is enabled (checked), then the Pen Tool will automatically switch to the Add Point Tool (when you place it over the path) and the Point Delete Tool (when you place it over an existing point). If the mode is disabled, then deleting and adding points will be possible only when using the appropriate tools.
![]()
The bending of curves is controlled through control points. Use the tool to select a control point Direct Selection Tool. Selecting the node to be edited (clicking with this tool on the node being edited). Then by moving the control points you affect the curvature of the curve in the region of the selected node. You can also move selected nodes with this tool. Tool Path Selection Tool designed to work with the curve as a whole, as with an object - for moving and transforming. For vector objects, the Free Transform mode is applied, exactly the same as for raster areas.
An important tool for working with key nodes is a tool called Convert Point Tool. The purpose of this tool is to transform node type. IN vector graphics Photoshop distinguishes between two types of key nodes - smooth And corner. The meaning of smoothed key nodes is that the control points of two curves converging at the same node Always on the same virtual line.
Another type of node, as we said, is called a corner node. The meaning of this type is that virtual lines passing through the control point of one of the segments and the common key node of both segments can converge at any angle.

The type conversion tool works like this - if the node is smooth (and by default nodes are created smooth) then clicking the conversion tool will change the node's type to angular. If, after pressing the mouse button, do not release it, but simply drag it, you will be able to control the bending of the segment at a particular node.

We started by highlighting two modes of operation of the Pen Tool. The first is the shape creation mode, and the second is the outline creation mode. Let's dwell on the mode of working with contours.
In this case, your path will not automatically fill and form a vector layer mask and layer. In this case, your outline will be purely virtual and not related to layers. To work with such paths, there is a palette called Path. All operations with contours are concentrated in this palette.

In the Path palette, paths (paths) are placed as layers in the Layers palette, and on one vector layer there can be several unrelated vector paths. Path controls are located on the bottom line of the Path palette. Painfully familiar pictograms with a trash can and a clean leaf have not changed their purpose in this palette either, i.e. respectively, this is the removal of the vector layer and the creation of an empty vector layer.
Until now, we have been thinking why in such an absolutely raster editor as Photoshop these vector tools are needed. A simple example of using vectors in Photoshop is again working with selections. As you can see from the figure, a number of Path palette icons are designed to convert a path (path) to a selection path and vice versa. In fact, after getting some skills in working with paths, you will realize that it is much easier to adjust a vector path to the shape of a selection than even using a fairly flexible quick mask. So if you want to edit the selection you can always convert it to a path (outline), then edit it and convert it back to a selection again. If you want to apply operations like Stroke and Fill, traditional for selection paths, then they are also at your disposal.
Boolean operations work somewhat unexpectedly. You can create paths in any of the logical modes, be it addition or subtraction. At this stage, you will not notice any action. But don't be fooled by the fact that you've found a bug in an almost flawless program. In fact, Photoshop remembers in which mode you created the path (the office writes ...) and as soon as you order the program to create a selection outline from your hodgepodge of paths, Photoshop will remember everything and perform all the operations that you prescribed to it when creating paths. The Create Selection Path from Path dialog box allows you to set the most important settings regarding selection paths (but only if you use the Make Selection command on the Path palette menu).

Please note that you can set the feather radius (Feather), enable or disable Anti-Aliased anti-aliasing. In the Operation section, you can set the logical mode for the newly created selection. The options in this section become available only if one selection path already exists. Accordingly, if you select the New Selection operation, the selection created will replace the existing selection; the Add to Selection option will add a selection created from a path to an existing selection; Substruct from Selection - will subtract the created path from the existing selection.
Tool Free Form Tool allows you to create a vector path in simple drawing mode, like a brush. Hold down the left mouse button and simply move the mouse to draw the outline you need. This tool has one main feature, which likens this vector tool to the Magnetic Lasso tool, is the option Magnetic. The principle of operation is the same, the tool looks for contrasting borders and draws a contour only there. Otherwise, the contour created by this tool does not differ from the usual contour.
- Views: 58428
While my note about masks in Photoshop has not cooled down, I urgently want to highlight the issue of converting a raster to a vector. Two days ago, I went into my chronophage Google Analytics and what did I see. It turns out that some of them get to my site for the request "raster to vector", but meanwhile, on my site there is not a single sensible note on this topic. People are hurting Google to convert raster to vector Corel Draw, Illustrator and even Adobe Photoshop . Let's start with Photoshop.
Raster to vector. Why is this needed?
Photoshop - raster program. The vector is present in it in the form of vector contours. As such, there are no vector objects in Photoshop. But there are vector paths that can be converted to a vector mask. The mask is applied to the effect or object and the result is a vector in Photoshop. The content of such an object is still raster, but can be converted to a vector when saved in some formats.
For example, we can create a fill and put a vector mask on it. Photoshop has a whole group of tools that do this for free and automatically, this is a group of vector primitives. Read more in my article Vector Primitives in Photoshop or. So the contour will be vector. Fill inside bitmap. 
Photoshop does not work with the vector to its full potential. Only uses its advantages here and there. But even in Photoshop, raster objects can be turned into vector ones. Why is this needed if there is an Illustrator? Well, how can I tell you. At active work with graphics there are different situations. Sometimes it's easier to convert the selection to a path on the spot than to go headlong into Illustrator and do tracing there. To weed a bed of strawberries in the country, you do not need to call a combine. In the end, not everyone wants or knows how to use Illustrator, not everyone needs it, not everyone can install it for themselves, and you need to convert a squiggle into a vector here and now. Sitting down with three volumes of Illustrator for a couple of weeks is not necessary at all.
Raster to vector conversion in Photoshop
What exactly is Photoshop capable of translating into a vector? Anything if you select this object with the group tools beforehand Select. Photoshop converts any selection into a path. You can read about selection tools in the article Selection Primitives in Photoshop. I'll give you a working example. Many years ago, I was approached by a very difficult customer who requested a difficult site. For the site, it was necessary to perform various art, and I decided to draw it in Photoshop. In the course of drawing, I converted it to a vector, and now I will tell you how.  Here is one such image that I painted with a hard-edged brush on a tablet. I circled the original Vitruvian Man, modified it and drew my own, different face from the original. The idea to vectorize art came by chance. But having implemented it, I got the opportunity to scale a person in any way. Moreover, previously torn edges and bumps have been smoothed out after vectorization.
Finding an image to trace
I found a butterfly on Google Images. We will translate it into a vector. Keep in mind that the larger the image, the smoother our vector object will turn out. This is true for both Photoshop and Illustrator. By a large image, I mean an image that is 1000 pixels wide or larger. My butterfly for example from 2000 pixels. 
Selecting an object
Choose from the menu Tool the most common magic wand Magic WandTool and click on the white area. So we created a selection area, but we need to select the butterfly.

Go to Select > Inverse or click on the workspace and from the menu that appears select Select Inverse. The point is that the created selection must be inverted to select the butterfly. To be honest, I don't care how you create your selection. Even if you manually stroke the lasso, it doesn't matter.

Create a vector outline
We have a selection, now convert it to a vector path path. Choose any selection tool like Lasso Tool, Rectangular Marquee Tool or Magic WandTool. Click on the marquee right click mouse and from the menu that appears select Make Work Path. In the menu that appears, set the degree of smoothing tolerance taste. The dependency is simple. The higher the number, the higher the smoothing. The lower the number, the lower the smoothing. High anti-aliasing means fewer vector knots and more inaccurate bitmap path following. In the case of my Vitruvian Man, this is exactly the effect I wanted.

So in the palette Path we have a workflow. If you don't have a palette Path open it Windows > Path Palette work area Path looks like a desktop or temporary shelter. Different outlines may appear on it, but if you take care of sequential saving, they will disappear over time. Double click on the path Work Path and save the outline separately. Contours in the area Path work just like layers in the palette Layers. If the contour is selected, then it is active and you can work with it.

Tools for working with paths in Photoshop - Path Selection Tool And Direct Selection Tool. We have a contour, but no object. If you've read my series of posts about vectors in Photoshop, you already know that a vector in Photoshop is represented as a vector mask for some kind of effect or graphic. The vector can also be present as a smart layer referring to an imported Illustrator file, but we'll leave that for another note. Select the path with the tool Path Selection Tool or in the path palette Path. Click Layer > New Fill Layer > Solid Color We have created a fill layer, which is immediately assigned a vector mask in the form of our path.

Finalization of the vector outline
Using the materials that I described in the articles Vector drawing tools in Photoshop and Add, Subtract, Intersect and Exlude in Photoshop, let's complicate the drawing. I took the instrument pen tool, selected the fill layer mask. In settings pen tool exposed Subtract and finished drawing some elements of our butterfly. I cut out patterns on the wings, and made the legs and antennae thicker.

Creating Custom Shapes
You can always save the resulting object into arbitrary shapes Custom Shapes. Some time ago I mentioned how this can be done in the article Custom Shape Tool in Photoshop. Select the butterfly layer and click Edit > Define Custom Shape Our butterfly appeared in the tool figures Custom Shape Tool.

And here is what we ended up with:

Converting a raster photo to a vector in Photoshop is a completely pointless exercise. But sometimes such techniques can be useful for side work with graphics and not only.
Transfer from raster to vector photos in Photoshop
Photoshop is not designed to convert raster graphics to vector. However, it contains several special effects that visually create a semblance of a vector image. And with the help of the technique I described, you can also make a vector image out of them in Photoshop. Let's take for example an ordinary photo taken by a photographer friend of mine. 
One of the effects I mentioned is Filter > Artistic > Cutout I leave the settings on your conscience. The image should be as realistic as possible, but strongly smoothed. We could stop there, the image already looks “vector”, but it is still raster.

Now we need to create vector areas equal to the number of colors in the photo. Pick a wand Magic WandTool and make sure the checkbox is unchecked in the settings contiguous. Select the first area and follow the entire path I described above. Create a path from the selection, a vector mask from the path, and so on.

In total, the entire photo is converted into vector areas. We will not convert the last white area to a vector. Just draw a big white square with the tool Rectangle Tool and place it under all layers. After light cleaning and finalizing the contours, the photo looks like the picture below. And once again, such work is not intended for Photoshop and is rather a perversion. But, it can be done, and in various situations, such techniques can come in handy. It took me 10 minutes to process the photo, so this kind of work does not take a lot of time. And remember, the larger the photo you lay out in this way into layers, the better and more elastic the outline will be able to go around the selection areas. The less angular and rough will be our vector in Photoshop. Various settings Tolerance when creating a contour, they will also give a different result. Successful experiments!

Tools for working with vector in Photoshop appeared a long time ago, but they began to be used in work relatively recently. This is due to the fact that for a very long time they were “raw” and because. The vector in Photoshop is not a specialized tool for work, and it has not been finalized. But everything changed with the release of Photoshop CC.
Why you need a vector in Photoshop
First I want to tell you why I use vector in Photoshop. There are many proven vector editors. The most common are Illustrator, CorelDraw, Xara. Most often I am engaged in web design, which means that my work is not the final result. Those. before becoming a website, interface, application, the layout will get to the layout designer. Most layout designers are fluent in Photoshop, but very superficially familiar with Illustrator. Therefore, the desire to “shove” everything into one file is quite logical. It's great when a layout designer receives one PSD which contains a complete layout, and even with the ability to edit elements. Change the button color, change the radius of the menu form, increase or decrease the block without losing quality - in 2 clicks and 1 minute! Vector in Photoshop allows you to do this without any special skills.
Features of working with a vector in Photoshop
If you have worked in any vector editor before, then a lot of things will seem familiar. But it takes a lot to get used to. All work in Photoshop is built with layers, it affected everyone vector tools.
1. To easily edit a vector in Photoshop, you need to place each shape on a separate layer.
2. Operations of “merge”, “subtraction”, “superimposition” are best applied to no more than two objects.
3. After the “merge”, “subtraction”, “overlay” operations, the contours of the original objects remain available for editing.
4. Raster styles can be easily applied to all vector objects. It is very comfortable.
5. You can apply transparency to vector objects and apply filters to them.
6. Individual layers and layer groups with vector objects can be easily cloned inside a document or copied to another PSD document.
7. Label each layer and group layers - this will save a lot of time.
Basic Primitives
As in any vector editor, the vector in Photoshop has ready-made primitives. Basic primitives:
“Rectangle”, “Rounded Rectangle”, “Ellipse”, “Polygon”, “Line”, “ Arbitrary figure". For each shape (at any time) you can set the thickness / type / color of the stroke and fill. Additional properties are available for specific primitives. For example, for a polygon, you can set the number of corners, and for a rectangle with rounded corners, you can set the rounding radius.
Basic tools
To draw an arbitrary vector or edit an existing one (including the contour of primitives), you must use the tools “Pen” (draw an arbitrary contour), “Pen +” (add new anchor points to the finished contour), “Pen-“ (delete anchor points from the finished contour), “Free pen” (draw an arbitrary contour by hand), “Angle” (change the bends of the contour curves, set the types of connections between the anchor points). 
To illustrate the process, a short video from which you will learn:
1. How to create a primitive
2. How to draw an arbitrary vector shape
3. How to edit the outline of a primitive
4. How to edit the outline of an arbitrary vector shape
Basic Vector Operations in Photoshop
There are 4 operations available in total: “Merge shapes”, “Subtract front shape”, “Merge shapes in overlay”, “Subtract shapes in overlay”. All these operations are available through the main top menu. Layers > Merge Shapes, or through the “Properties” toolbar (top menu Window > Properties).
Attention! Before starting any operations to merge vector shapes, make sure that the layers of these shapes are selected in the “Layers” toolbar (turn it on F7 or Window > Layers).
A short video illustrating the basic operations of "merging shapes" in Photoshop.
Change color, size and apply styles
Here we come to the most interesting. Vector in Photoshop allows you to resize both up and down without losing quality. To do this, select the desired layers in the "Layers" toolbar, press Ctrl+T (or Command+T if you have a MAC) and dragging the markers of the selected path with the mouse adjust the size. In order for the size to change proportionally, you need to hold down the Shift key. 
Short video:
1. Resize a Vector Shape
2. Change the Fill Color of a Vector Shape
3. Add Style to the Vector Shape
Download PSD Example (Free)
To make it easier for you to figure out how to use a vector in Photoshop and see how these tools can be applied in practice, I am posting an Infographic file made by me completely using vector tools.
Ask a Question
If something doesn’t work out for you or if you have any questions, write in the comments and I will help you figure it out. You can also watch videos using vector tools.
16.03.2014 27.01.2018
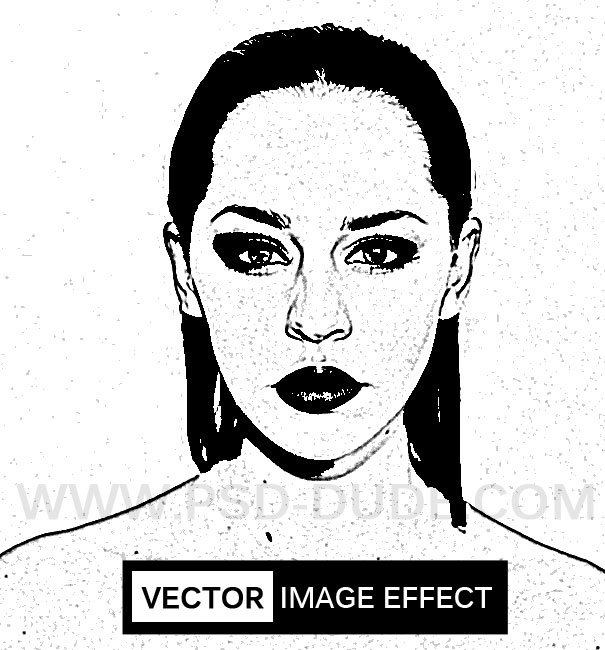
Such a vector drawing from a photograph is made in a couple of minutes in Photoshop without much effort. All you need to do is apply a couple of filters, functions and adjustment layers. How to do this, read the instructions in this lesson.
With the help of Photoshop, we can convert any drawing into a vector image.

Select a photo and open it in Photoshop.

Make a copy of the layer. Name one layer Girl 1 Layer, and second Girl 2 Layer.
Apply function Image-Adjustments-Thresholds(Image - Correction - Isohelia) for layer Girl 1 Layer.

Set the colors to white and black in the toolbar.
Apply a filter Filter - Sketch - Photocopy (Filter - Sketch - Photocopy) for layer Girl 2 Layer.

Layer blend mode Girl 2 Layer install Multiply(Multiplication) and merge the layers.
Reapply the function Threshold (isohelia)

Now you need to smooth the edges, for this apply a filter Style - Difusse(Stylization - Diffusion)

The vector image is ready.
Now, to somehow transform it, you can color it. To do this, simply take a black brush and correct the lines of the facial features.
For color fill use Paint Bucket Tool (fill). This won't be a problem for you.