We bring to your attention Full description driver control panel. Please note that some settings are available only for certain types of equipment used. IN this review We have tried to reflect all possible settings.
Main panel window
The main window is shown in the illustration:
The navigation bar is on the left and allows you to navigate through the settings you need with one click. The View menu allows you to enable an advanced view that gives you the most full access to all the options of the driver settings or customize the custom view of the panel, leaving only those items that you intend to use. Also, in the lower left part of the panel, access to help system control panel (link "System Information"):

from which you can find out about file versions, installed drivers and other NVIDIA software, as well as graphics card specifications.
3D Options Category
Adjusting images with preview
The following settings are available:
- Settings according to 3D application— this option allows you to control the quality and speed of displaying by means of 3D applications. However, the default enabled trilinear filtering optimization and anisotropy sampling optimization are retained regardless of application settings.
- Advanced 3D Image Settings- uses advanced driver settings set by users themselves. The "Go" link gives you access to the "Manage 3D Settings" tab. It is management additional options driver for maximum image quality.
- Custom settings focusing on…: - the most interesting option that allows simplified management of additional driver options for novice users:
Meaning Performance corresponds top speed operation and includes settings: v-sync off, all optimizations (trilinear filter optimization, anisotropy mip filter optimization, anisotropy sampling optimization) enabled, negative level of detail: prohibit negative level - enabled, texture filtering - "quality", control anisotropic filtering and smoothing is done by applications.
Meaning Balance has the following settings: anti-aliasing - 2x, anisotropic filtering - 4x, all optimizations (trilinear filtering optimization, anisotropy mip filter optimization, anisotropy sampling optimization) are enabled, negative level of detail is enabled, texture filtering is "quality", v-sync is managed by applications.
Meaning Quality has the following settings: trilinear filtering optimization - enabled, anti-aliasing - 4x, anisotropic filtering - 8x, negative detail level - enabled, texture filtering - "quality", vertical synchronization - controlled by applications.
All modes are provided with detailed explanations for their use, and a rotating company logo demonstrates the use of certain settings.
For more detailed settings, use the window Manage 3D settings.
Manage 3D settings
Global options

Possible settings bookmarks Global options :
Anisotropic filtering. Possible values are "Off", "Application control", "2x-16x" (depending on the model of the video adapter). Anisotropic filtering is by far the most advanced technique for compensating pixel distortion, and in combination with trilinear filtering, it gives best quality filtration. Activating any value other than "Control by application" allows you to ignore application settings. But we should not forget that this is a very resource-intensive setting that significantly reduces performance.
Vertical sync pulse. Possible values - "On." and Off, Use Application 3D Setting. By vertical synchronization (it's completely unclear why NVIDIA moved away from this term) they mean the synchronization of image output with the monitor's refresh rate. Enabling vertical synchronization allows you to achieve the smoothest image on the screen, turning it off allows you to get the maximum number of frames per second, often leading to a breakdown (shift) of the image due to the fact that the video adapter has started drawing the next frame, while the output of the previous one has not yet finished . Due to the use of double buffering, enabling vsync may cause frames per second to drop below the monitor's refresh rate in some applications.
Enable scalable textures. Possible values are "None" and "Bilinear", "Trilinear". None - Do not enable scalable textures in applications that do not support them. Bilinear - Better performance at the expense of quality. Trilinear - good image quality with slower performance. Using this option in the forced bilinear filtering mode is highly discouraged, since the image quality obtained by forcing the option is simply depressing.
Background lighting shading. Enable Ambient Occlusion technology to simulate global illumination (shading). The traditional 3D lighting model calculates the appearance of a surface solely from its characteristics and the characteristics of light sources. Objects in the path of the light cast shadows, but they do not affect the illumination of other objects in the scene. The global illumination model increases the realism of the image by calculating the intensity of light reaching the surface, and the brightness value of each surface point depends on the relative position of other objects in the scene. Unfortunately, an honest volumetric calculation of shading caused by objects located in the path of light rays is still beyond the capabilities of modern hardware. Therefore, the ambient occlusion technology was developed, which allows using shaders to calculate the mutual shading of objects in the “virtual camera” plane while maintaining acceptable performance, which was first used in the Crysis game. This option allows you to apply this technology to display games that do not have built-in support for ambient occlusion. Each game requires a separate adaptation of the algorithm, so the option itself is enabled in the driver profiles, and the panel option only allows the use of the technology as a whole. A list of supported games can be found on the website NVIDIA. Supported for GPUs G80 (GeForce 8X00) and newer starting with driver 185.81 in Windows Vista and Windows 7. May reduce performance by 20-50%. Possible values - "On." and "Off".
Maximum amount pre-trained personnel- allows you to limit the management of the maximum number of prepared central processing unit frames when disabled. In case of problems with the slow response of the mouse or joystick, it is necessary to reduce the default value (3). Increasing the value can help achieve a smoother picture at low frame rates.
Extension limitation. Possible values are "Enabled" and "Disabled". It is used to solve compatibility problems with old OpenGL applications due to overflow of memory allocated in them to store information about the capabilities of the video card. In case of application crashes, try enabling the extension restriction.
Stream optimization- allows you to control the amount used by GPU applications, in most cases, changing the default value (Auto) does not require. However, some older games may not work correctly in these configurations. Therefore, it is possible to control this option.
Power management mode. Possible values are "Adaptive" (default) and " Maximum performance". With GeForce 9X00 and newer graphics cards that have separate performance modes, for games and programs that put a little strain on the GPU, the driver does not put the graphics card into 3D performance mode. This behavior can be changed by selecting the "Maximum Performance" mode, then any time the 3D graphics card is used, it will switch to 3D mode. These features are only available when using driver 190.38 or higher in Windows Vista and Windows 7.
Smoothing - gamma correction. Possible values "On" and "Off". Allows you to perform gamma correction of pixels during anti-aliasing. Available on video adapters based on G70 GPU (GeForce 7X00) and newer. Improves the color gamut of applications.
Smoothing - transparency. Possible values are Off, Multiple Sampling, Oversampling. Controls an improved anti-aliasing technology that reduces the "staircase" effect at the edges of transparent textures. Please note that under the phrase “Multiple sampling”, the more familiar term “Multi-sampling” is hidden, and under “Over-sampling” - “Supersampling”. The last method has the most significant impact on video adapter performance. The option works on video cards of the GeForce 6x00 family and newer, using drivers version 91.45 and higher.
Smoothing - options. The item is active only if the item "Smoothing - mode" is set to "Increase application settings" or "Override application settings". Possible values are "Application control" (which is equivalent to the "Application control" value of the "Anti-Aliasing - Mode" item), and from 2x to 16x, including "proprietary" Q / S modes (depending on the capabilities of the video card). This installation seriously affects performance. For weak cards, it is recommended to use the minimum modes. It should be noted that only the 8x, 16x, and 16xQ options will have an effect for the "Application Setting Increase" mode.
Smoothing - mode. Enable Full Screen Image Anti-Aliasing (FSAA). Anti-aliasing is used to minimize the "jaggies" effect that occurs at the edges of 3D objects. Possible values:
- "Application control" (default value) - anti-aliasing works only if the application / game directly requests it;
- "No" - completely disable the use of full-screen anti-aliasing;
- "Application settings override" - forces the anti-aliasing specified in the "Anti-aliasing - options" item to be applied to the image, regardless of whether or not the application uses anti-aliasing. "Override Application Settings" will have no effect on games that use the technology Deferred shading, and DirectX 10 and above applications. It can also cause image distortion in some games;
- Increase Application Settings (only available for GeForce 8X00 and newer graphics cards) - Allows you to improve anti-aliasing requested by applications in problem areas at a lower performance cost than using Application Settings Override.
Error messages. Controls whether applications can check for rendering errors. The default value is "Off". many OpenGL applications do this check quite often, which degrades overall performance.
Appropriate texture binding. Possible values - "Off." , "Hardware used", "OpenGL specification used". By "texture binding" is meant the binding of texture coordinates that go beyond its limits. They can be snapped to the edges of the image or within it. You can disable snapping in case of texture defects in some applications. In most cases, changing this option is not required.
Triple buffering. Possible values - "On." and "Off". Enabling triple buffering improves performance when using vertical sync. However, it should be remembered that not all applications allow you to force triple buffering, and the load on video memory increases. Only works for OpenGL applications.
Multiple display acceleration. Possible values are Single Display Performance Mode, Multi Display Performance Mode, and Compatibility Mode. The setting determines Extra options OpenGL when using multiple graphics cards and multiple displays. The control panel assigns the default setting. If you have problems running OpenGL applications in multi-GPU/Display configurations, try changing the setting to Compatibility Mode.
Texture Filtering - Anisotropic filtering optimization. Possible values - "On." and "Off". When enabled, the driver forces the use of a point mip filter at all stages, except for the main one. Enabling the option slightly degrades the picture quality and slightly increases performance.
Texture filtering. Possible values are " High quality”, “Quality”, “Performance”, “High performance”. Allows you to control the Intellisample technology. The parameter has a significant impact on image quality and speed:
- "High Performance" - offers the highest possible frame rate, which gives the best performance.
- "Performance" - Setting the optimal performance of applications with good image quality. Gives optimal performance and good image quality.
- "Quality » is the standard setting that gives the best image quality.
- "High quality" - gives the best image quality. Used to obtain images without using software optimizations texture filtering.
Texture filtering - onegative deviation of UD (level of detail). Possible values are "Allow" and "Binding". Applications sometimes use a negative Level of Detail (LOD) value for more contrast filtering of textures. This increases the contrast of a still image, but the effect of "noise" appears on moving objects. For more quality image when using anisotropic filtering, it is desirable to set the option to "snap" to prevent negative UD deviation.
Texture filtering - trelinear optimization. Possible values - "On." and "Off". Enabling this option allows the driver to reduce the quality of trilinear filtering to improve performance, depending on the selected Intellisample mode.
Software settings

The bookmark has two fields:
Select a program to customize.
In this field, you can see the possible application profiles that are used to override the global driver settings. When the corresponding executable file is launched, the application-specific settings are automatically activated. Some profiles may contain settings that cannot be changed by users. As a rule, this is the adaptation of the driver for a specific application or the elimination of compatibility problems. By default, only those applications that are installed on the system are displayed.
Specify settings for this program.
In this field, you can change the settings for a specific application profile. Scroll available settings completely identical to the global parameters. The "Add" button is used to add own profiles applications. When pressed, a window opens. Windows Explorer, with which you select the application's executable file. After that, in the "Specify settings for this program" field, you can set personal settings for the application. The "Delete" button is used to delete user application profiles. Please note that it is impossible to delete / change the initially present application profiles using the driver, for this you will have to use third party utilities, such as nHancer.
Installing the PhysX Configuration
Allows you to enable or disable the processing of physical effects using NVIDIA technologies PhysX by means of a video card, provided that it is based on a G80 (GeForce 8X00) GPU or newer. Support is enabled by default, it may be necessary to disable it when solving problems with applications that incorrectly use PhysX (for example, the Mirror`s Edge game without patches). If there is more than one NVIDIA GPU in the system, the user is given the option to select the GPU on which the physics effects will be processed, unless SLI is used. You can find more details about the features of using NVIDIA PhysX in a special FAQ section of our website.
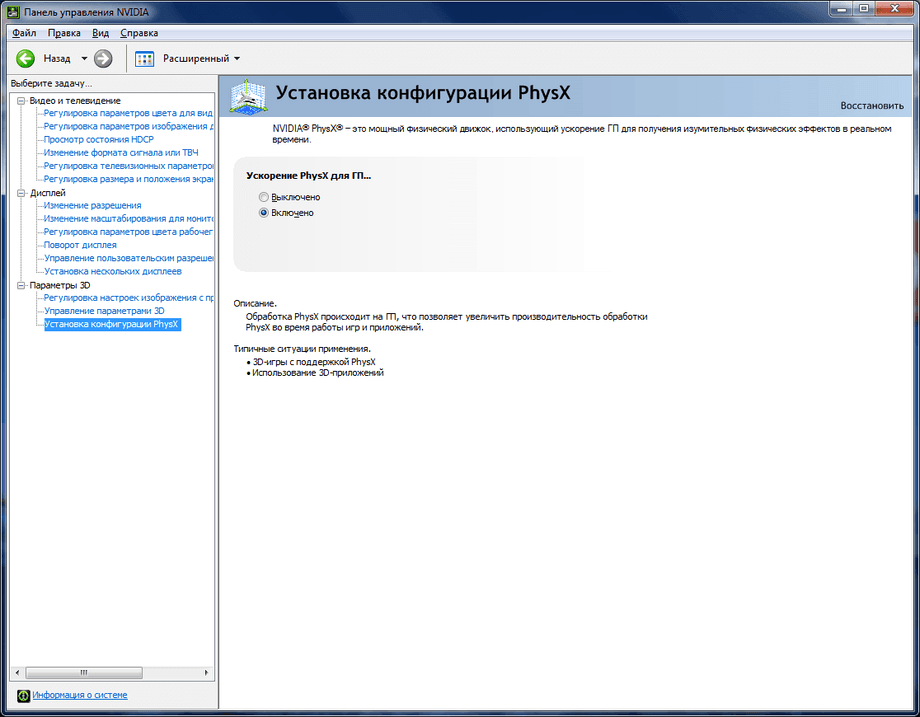
Additionally, starting with driver version 195.62, you can enable the display of the PhysX acceleration indicator in games. To do this, in the top menu " 3D Options" check " Show visual indicator PhysX". The acceleration status is displayed in the upper left corner of the image.

By default, all software for Nvidia video cards comes with settings that imply the maximum image quality and the imposition of all effects supported by this GPU. Such parameter values give us a realistic and beautiful image, but at the same time reduce overall performance. For games where reaction and speed are not important, such settings are quite suitable, but for network battles in dynamic scenes, a high frame rate is more important than beautiful landscapes.
In the framework of this article, we will try to configure the Nvidia video card in such a way as to squeeze out the maximum FPS, while losing a little quality.
There are two ways to configure the Nvidia video driver: manually or automatically. Manual tuning involves fine-tuning the parameters, while automatic tuning saves us from having to “poking around” in the driver and saves time.
Method 1: Manual setup
For manual setting video card parameters, we will use the software that is installed with the driver. The software is simply called: "Panel Nvidia controls» . You can access the panel from the desktop by right-clicking on it and selecting the desired item from the context menu.

- First of all, we find the point "Adjusting Image Settings with Preview".

Here we switch to the setting "According to 3D application" and press the button "Apply". With this action, we enable the ability to manage quality and performance directly by the program that uses the video card in this moment time.

- Now you can go to the global parameter settings. To do this, go to the section "Manage 3D Settings".

On the tab "Global Options" we see a long list of settings. Let's talk about them in more detail.


- After completing all settings, click on the button "Apply". Now these global parameters can be transferred to any program (game). To do this, go to the tab "Program settings" and choose desired application in the dropdown list (1).
If the game is missing, then click on the button "Add" and look for the corresponding executable file on disk, for example, worldoftanks.exe. The toy will be added to the list and for it we set all the settings to "Use global setting". Don't forget to press the button "Apply".

According to observations, this approach can improve performance in some games up to 30%.
Method 2: automatic setting
Automatic configuration of the Nvidia video card for games can be done in the proprietary software also supplied with the latest drivers. It's called software. This method available only if you use licensed games. For pirates and repacks, the function does not work.

By doing these steps in Nvidia GeForce Experience, we tell the video driver the most optimized settings suitable for a particular game.
These were the two ways to tweak Nvidia graphics card settings for gaming. Tip: try to use licensed games to save yourself from having to manually configure the video driver, as there is a possibility of making a mistake by not getting exactly the result that was required.
Part 4. General overview of the graphic settings of the game
In general, a good article on the graphic settings of this game (with comparison screenshots different settings) on the NVidia website: www.geforce.com/whats-new/guides/tom-clancys-the..
(but nevertheless, the material is there - according to the principle of "trust but verify")
What I personally will say in the end:
- Image - Brightness: I always set this setting to 100% for myself - it's better when it's light in multiplayer than when it's dark (yes, and this particular option sometimes crashes after restarting the game, and you need to re-enable it)
- Graphics - Graphics quality:
- Graphics - V-sync:
- Graphics - Frame Limit: in the course of our story, this setting has so far remained in the "off" value. - turn it on only for modern top-end views
- Graphics - Shadow quality: in the course of our story, this setting has so far remained in the "low" value. The PCSS and HFTS values make super-cool shadows with clear contours and other effects (in itself, this is for shadows for multiplayer, under some doubt), at the same time they eat a lot of productivity - and as a result, they can only be relevant for cool videos, provided that this particular vidyaha supports this particular technology in general
- Graphics - Shadow Resolution: in the course of our story, this setting (going "hand in hand" with the previous setting) has so far remained in the "low" value. Increasing this setting seriously eats up productivity, and is relevant only for cool videos
- Graphics - Number of local shadows: the setting is described above in the story
- Graphics - Resolution of local shadows: the setting is described above in the story
- Graphics - Contact shadows: in the course of our story, this setting has so far remained in the "off" value. Increasing this setting leads to an increase in the quality of contact shadows, which are described in the very article on the NVidia website as "mouse fuss, not noticeable in multiplayer". So I leave it with me, in the meaning of "off".
- Graphics - Anti-aliasing post-effect:
- Graphics - Temporal anti-aliasing:(anti-aliasing) setting is described above in the story
- Graphics - Scalable Resolution: in the course of our story, this setting has so far remained at the value of "100%". This is DSR - turn it on, which may be relevant for cool videos with 8+ gigs of video memory on board (you need to turn it on starting from NVidia Control Panel - Manage 3D settings - Global Settings - DSR Factors) - to get yourself a cooler anti-aliasing than all this baby talk with "usual" anti-aliases (FXAA, MFAA, TAA, etc.)
- Graphics - Image Sharpness: the setting is described above in the story
- Graphics - Particle quality: in the course of our story, this setting has so far remained in the "low" value. So I leave it at my place - we don’t need in multiplayer so that with sparks and all sorts of fragments, the view of the enemy is covered.
- Graphics - Influence of wind on falling snow: in the course of our story, this setting has so far remained in the value of "no". This setting affects only the effect of "flow around" the corners of buildings by wind-blown snow flows - otherwise the wind in the game always affects falling snow, even when this setting is disabled (see that NVidia offsite article); but in multiplayer we don't need falling snow to distract us by pouring "not by default" - that's why I leave this setting in my "no" value.
- Graphics - Volumetric fog: in the course of our story, this setting has so far remained in the "medium" value. With an increase in this setting - it improves the quality of the picture very very not much (it makes the fog lit by light sources just a little better) - but it eats up performance a lot - I recommend turning it, only for owners of top-end video
- Graphics - Quality of reflections: in the course of our story, this setting has so far remained in the "low" value. So I leave it with me - because. all these reflections in puddles, in shop windows, etc. - rather interfere in multiplayer (rather than if all these reflections are "muddy" and hardly noticeable)
- Graphics - Quality of local reflections: in the course of our story, this setting has so far remained in the "off" value. I will say the same about it as about the previous setting.
- Graphics - Internal dispersion: the setting is described above in the story (makes the reflection of light from various surfaces, including the skin of faces, snow, etc. "soft", which significantly improves the pleasantness of the game picture)
- Graphics - Anisotropic Filtering: the setting is described above in the narrative
- Graphics - Parallax Maps: in the course of our story, this setting has so far remained in the "off" value. This setting, when it is increased, gives the illusion of relief to surfaces that do not have (or few) their own native details - for example, a brick wall, which is flat in itself, becomes with a feeling of the relief of bricks on them. I don’t know for sure whether this setting affects the rendering of characters, but it’s not worth it to “enrich” with reliefs all possible walls and other “background” surfaces in multiplayer (complicate the visibility of characters for the sake of the visibility of these walls), so I leave it this setting in the meaning of "off".
- Graphics - Background shading: in the course of our story, this setting has so far remained in the "low" value. I recommend a further increase in this setting only for cool videos. further "quality increase" will already be hardly noticeable, but the productivity will be consumed quite a lot
- Graphics - Depth of field: in the course of our story, this setting has so far remained in the "off" value. We do not need to "blur" the part of the picture that is not in the focus of the character's vision - also, according to experience, this setting is turned on, sometimes it works "at the wrong time" in the game - it blurs the background at the moment when it does not need to be blurred - and can "fail" in gameplay.
- Graphics - Detailing of objects: the setting is described above in the story
- Graphics - Broadcast range increase: the setting is described above in the story
- Graphics - Chromatic aberration: in the course of our story, this setting has so far remained in the value "no.". This setting, when enabled, makes the picture of the game with the effect of "old film" - the same effect also makes the picture of the game more "blurred". In that article on the NVidia offsite, doubts were expressed about this setting, which is very much for an amateur and also "blurs" the picture of the game at the same time. In multiplayer, it is definitely better that the picture is clear (and not this). Therefore, I leave this setting as it is, in the value of "no.".
- Graphics - Neutral lighting: in the course of our story, this setting has so far remained in the value "no.". This setting, when enabled, makes the picture of the game more "darkened-horror". We don't need to make the picture darker in multiplayer - that's why I leave this setting as "no."
- Graphics - Lens flare: in the course of our story, this setting has so far remained in the value "no.". We don’t need to be distracted by these additional glare in multiplayer (and block our view in it with them) - that’s why I leave this setting as “no.”.
- Graphics - Vignetting: in the course of our story, this setting has so far remained in the value "no.". We do not need this dimming of the game picture along its edges, playing in multiplayer - that's why I leave this setting as "no."
The manual describes in detail the process of managing settings NVIDIA graphics cards. We will also show you how to adjust NVIDIA 3D settings for some games. Before setting up, you need to install drivers for Nvidia.
If the drivers are installed, we proceed to the configuration.
Click on desktop right click mouse to display the pop-up menu. In which we select the item:
After that we get to the control panel. Let's go to the section: 3D Options
In the window that appears, first select the item: Adjusting picture settings with preview
Press: Apply(as shown in the picture below)

Now the fun begins.
Configuring NVIDIA 3D Settings for Games
Let's go to the section: Manage 3D settings
 After that, we proceed to configure the parameters in the right window.
For the application to work correctly, the following parameters must be set:
- CUDA- GPUs: All
- Anisotropic filtering: Turn off
- V-Sync (vertical sync): Turn off
- Vertical sync pulse": Use 3D application setting
- Background lighting shading": Turn off
- Maximum number of pre-trained frames: you should select the item that is marked with the NVIDIA icon
- Stream optimization: Automatically
- Power management mode: Adaptive
- Smoothing - gamma correction: Turn off
- Smoothing - options: Turn off
- Smoothing - transparency: Turn off
- Smoothing - mode: Turn off
- Triple buffering: Turn off
- Multi-Display/Mixed GPU Acceleration: Multi display performance mode
- Texture filtering - anisotropic optimization by sample: Turn off
- Texture filtering - quality": Top performance
- Texture Filtering - Negative Deviation UD: Turn on
- Texture filtering - trilinear optimization": Turn on
- Anisotropic filtering. Directly affects the quality of textures in games. Therefore, it is recommended switch off.
- Enable scalable textures: Turn off
- Extension Limit: Turn off
After changing all the settings, click the Apply button. These settings do not guarantee 100% results, but in 90% of cases they can increase FPS by up to 30%.
Hello admin, I have a question. How to enable the integrated graphics card if there is a powerful discrete one in the system unit (placed separately). I just want to check, just in case, if the built-in one works or not. In short, I'll tell you my whole story.
I bought a new system unit, in the motherboard ASUS board there is a built-in video card, but I have never connected a monitor to it, since there is also a powerful discrete video card NVIDIA GeForce which I use all the time. And at a certain moment, the image on the monitor went in stripes and began to disappear periodically, I decided to check if the built-in motherboard video card. With the computer turned off, I disconnect the DVI cable from the discrete video card and connect it to the built-in one, then I turn on the computer and there is nothing on the monitor, just a black screen, while the system unit is working at that time. As a result of this, I came to the conclusion that not only is the discrete video card defective, but the one built into the motherboard also does not work. Am I right or not?
How to enable the integrated graphics card
You are half right, maybe your discrete video card is faulty, but if you want to use the built-in video card, then you first need to enable it in BIOS. Or another way - you just need to remove your separately installed video card from the connector (of course, on a turned off computer) and then the built-in video card will automatically connect to work. More full information should be in your motherboard manual.How to remove video card from system block you can find out from our article -. That's how enable integrated video card in BIOS, I'll tell you now.
We restart the computer and enter the BIOS, who does not know, we read in this article. Almost all modern computers there is a UEFI BIOS, click Advanced.

Enter advanced mode. OK. You can select the system language Russian.

And everything in your UEFI BIOS will be in Russian, but so few people work, learn to work in the English interface. First I will show how to do everything in Russian, and then in English.
Advanced tab. System agent configuration.

Graphics options.

Set the Main display option to iGPU - integrated graphics.

To save the changes we made to the BIOS, press the F10 key,

then Yes and reboot.

Turn off your computer, connect your integrated graphics card and monitor with a DVI or VGA cable, then turn on your computer. And install the drivers for the connected integrated video card.
We go to the device manager, right-click on the integrated video adapter and select Update drivers from the menu.


Automatic search for updated drivers. If the driver does not install automatically, then .
If the interface language of your UEFI BIOS is English.
Advanced tab, System Agent Configuratio n ,

Then Graphics Configuration .

We set the Primary Display option to the iGPU parameter - integrated graphics,

save the changes - press the F10 key, then Yes, reboot.

We turn off the computer, connect your built-in video card and monitor with a DVI or VGA cable, turn on the computer, install the drivers.