Content
Prolonged use of the computer affects its performance. No matter how good your equipment, junk files, extra programs and dust will affect the operation of the PC, so everyone will have to clean it. If the computer slows down, how to clean it in several ways is described below.
Why does the computer slow down
When buying a new laptop or PC, it is always a pleasure to work with it: everything opens quickly, it instantly reacts to your actions, applications load in a matter of seconds. Over time, there will be many reasons that will lead to a deterioration in the performance of your computer - it will start to slow down, heat up, periodically reboot. This condition can be caused by one or more of the following reasons:
- body pollution: dust, wool, etc.;
- unnecessary programs load RAM;
- the processor is overheating;
- windows slow down viruses;
- junk on the hard drive, junk files.
What to do if the computer slows down
When you notice that the PC has become noticeably slower to work, there are two ways to solve this problem - do the cleaning yourself or call the wizard. If you know for sure that you can’t handle it, it’s better to call a specialist, otherwise you can use the options on how to clean your computer so that it doesn’t slow down. The primary task of the user is to determine why the computer is buggy, slows down. This will give the direction in which to work:
- clean from viruses, junk files;
- improve cooling;
- clean the body, parts;
- defragment disks.
How to clean your computer from garbage yourself

In order to save the computer from the brakes, you need to clean it of garbage. To do this, you will need a good vacuum cleaner with a blowing mode, a dust cloth and a set of special utilities For Windows cleaning. The latter are the only effective way how to clean up computer desired programs, but you should still start with the usual physical cleaning of the case by hand.
Cleaning your computer from dust
Those who are busy with the question of how to clean the computer so that it does not slow down should start by opening the case. If you are using a desktop computer, then you need to remove one sidebar With system block. In the case of a laptop, you need to unscrew back panel completely to access hardware details. A huge amount of dust always flies in the room, and the fans of the cooling system suck it in, it accumulates on the radiators, cooler blades and the board. Take a damp cloth and switch the vacuum cleaner to blowing air. You need:
- Shut down the PC, turn it off completely (from the network).
- Wipe the plastic and iron elements of the case with a rag, do not touch the parts (they need a dry cloth).
- Use a vacuum cleaner to thoroughly blow through all the elements, process the cooling system of the processor, video card, power supply well. The ideal option would be to remove the parts and clean them thoroughly one by one. It is only worth doing this when you are sure that you can put everything back together, otherwise limit yourself to a simple purge.
A clogged cooling system does not perform its functions 100%, which is why the computer elements overheat and start to slow down in applications, games, just when working on a PC. This is especially true if you have a powerful model - all TOP parts get very hot. In some cases, the problem of overheating lies in the dried thermal paste on the processor chip. In such cases, it must be removed, wiped off the old paste and applied a new layer.
Virus Elimination
The most common reason why a computer starts to slow down is viruses. It’s easy to pick them up on the Internet along with program installers - sometimes they disguise themselves as torrent files, and you can’t immediately identify them: annoying ads, banners, and extra programs start to appear in the system startup. Instructions on how to properly clean the computer so that it does not slow down:
- Buy a licensed antivirus or download free utility D.R. web cure. To find it, go to the "Download" section on the official website of the developer.
- Next, the cleaning process using the Cureit utility will be discussed. When installing, agree with all points of the terms of use.
- Open the program and click on the "Run scan" button - the PC scan will begin.
- This procedure can take a lot of time (depending on the size of the hard drive). Upon completion, detailed information on the found malicious files will appear.
- Click on the large orange "Defuse" button.
- After the virus is removed, the PC will restart.

Removing unnecessary programs
The next step to make your PC fast again is cleaning your laptop. unnecessary programs and files. Some applications run in background, getting into autoload. This loads the RAM, which is especially noticeable if you have a little of it (4GB). At the same time, half of these programs are not used, they just hang in the task manager, eating up some of the resources. You can remove them like this:
- Click on Start.
- Go to the "Control Panel" section and find the "Add or Remove Programs" section.
- You will see a list of applications installed on your PC. Find and remove the ones you don't use or didn't install yourself.
Check out other ways to.
Running the built-in Disk Cleanup feature
During work, people often install programs, download files from the Internet, sometimes uninstall games and applications incorrectly. After such actions, it is necessary to clean the system from residual, junk files. It can be done different ways, but the developers have created a built-in windows tool called Disk Cleanup. It analyzes the files in the trash, temporary directory, removing empty folders and program tails. To activate:
- Go to "My Computer".
- Press desired section hard drive right click mice.
- In the menu, find the item "Properties", click on it.
- In the window that opens, there is a button "Disk Cleanup", confirm the action.
Defragment your hard drive
This is another built-in feature of Windows, it is an option on how to clean your computer so that it does not slow down. The PC hard disk has a unique system for recording data in the form of sectors. Users often erase and install games, programs, so the sectors are filled unevenly, which leads to the system slowing down. To defragment a disk, you need to:
- Go to "My Computer" and right-click on the desired partition of the hard drive.
- Right-click, in the menu, click on the "Properties" item.
- Go to the "Service" section.
- Click on the "Defragment" or "Optimize" button (on Windows 10).

Cleaning your computer of junk files and empty folders
If you yourself cannot determine which of the files and folders are needed and which are not, then fixing this situation will help special software. These programs analyze your system, registry, hard drives and offer to remove a certain number of objects that, in their opinion, are of no value. Below it will be described which program to clean the computer so that it does not slow down.
The best programs for cleaning your computer
To clean the PC, use different programs: for example, RegCleaner, Norton WinDoctor, but CCleaner is considered the best, which has wide functionality and a simple management interface. To download, you can go to the official website and click the "Download" button (registration is not required for this). Install the program and run it, then you need:
- You will see the "Clear" tab, in which you can delete the cache (temporary files) from the browser. In the menu on the left, you can make settings for searching for objects that need to be cleaned, but it's better to leave everything as it is. Click on the "Analyze" button, all kinds of "broken" documents, copies, etc. will be found. Once the process is complete, click "Clear".
- Next, you should clean the system registry to get rid of errors that cause slowdowns. Go to the "Registry" section in the left menu and click the "Search for problems" button. The utility will find the necessary documents, provide a full report, offer to make a backup copy (agree and save). Then click the "Fix" button.
- Then go to the "Service" tab, in which you need to select the "Startup" section. Select all unfamiliar programs for you, click "Turn off" next to them.
The utility performs all actions automatically, you do not need to configure or enter anything additionally. Backup copy The registry is needed in case some functions stop working after being fixed by the program. After such a cleaning of the PC, it should be restarted and check if unnecessary applications turned off from startup have started.
Video: how to clean your computer from viruses and unnecessary programs
Did you find an error in the text? Select it, press Ctrl + Enter and we'll fix it!Discuss
How to clean your computer yourself so that it does not slow down, using programs and built-in system functions
Sooner or later, but almost every computer owner asks himself the question: how to clean the computer from dust? Some people come up with this idea on their own. And someone is waiting until, as they say, "the cancer on the mountain does not whistle."
Often, users encounter problems with the unsatisfactory performance of their "iron friend", which are not caused by an outdated processor, a weak video card, or insufficient RAM. Often there are times when you sit down to play your favorite 3D shooter, and at the most inopportune moment the computer freezes, and at that moment we are contemplating a screenshot of an enemy bullet flying at you on the screen. 3-5 seconds pass - and you are already on the list of the heroically dead.
Questions arise why is this so? What's up with the computer? May apply to professional repair PC? After all, just yesterday I played the same game, and there were no interruptions in the system?! What's happened? Maybe the video card is covered? Processor "tired"? Or maybe on a flash drive, friends brought not only new films, but also a couple of viruses?
So what happened to the computer?
And you start with different antivirus programs“gut” your computer for “disease-causing” Trojans, worms, etc. Also, with the help of various utilities that optimize the operation of the system, fix errors, clean the registry, and so on.
Having cured all viruses, corrected errors, and with a sense of duty done to our computer, we load our favorite game again. And-and-and ... after a couple of minutes of playing with anger, we almost break the monitor with the mouse! Same thing again...
Now we are calling our friends and waiting for an answer from them, who is to blame and what to do about it. And then one of them, jokingly or seriously, offered to clean the computer from dust. And you, in the absence of other options for solving the problem, pick up a brush and a vacuum cleaner, 15 minutes of simple manipulations and BINGO!!! We turn on the computer, and he - as reborn.
Dust is the main enemy of the computer!
Today it is hardly possible to find a family that does not have a single computer in the house. But over time, unnecessary files accumulate on it. They remain after installation. various programs and applications, or dust that accumulates inside the system unit, settling on hard drives, video card, motherboard.
In addition, dust envelops wires (loops), fans and radiators, thereby interfering with their cooling and increasing the fire hazard. However, the CPU temperature can reach 90°C when it is normal temperature varies from 30 to 60°C, depending on the model of the processor itself.
Just before cleaning your PC from dust, you need to check the temperature of your processor, chipset, hard drive and video card. After cleaning the computer from dust, you will notice a significant decrease in temperature. This point is very important, because in the absence of the necessary cooling, your computer will often automatically restart, or not turn on at all.
So, we clean the computer from dust, and what is needed for this?
- Vacuum cleaner (if not available, ask neighbors)
- Screwdriver (Phillips)
- Brush (preferably with soft bristles)
- simple pencil
- Eraser (eraser)
- Two skillful hands
- Accuracy
- Optional rubber gloves
Cleaning the computer from dust. Stages.
Stage one. Preparing for cleaning
1. Disconnect the computer from the network (remove the plug from the socket).
2. Disconnect all components from the system unit (external modem, printer, sound system etc.) By the way, in order to avoid later problems with the reverse connection of all these "devices" to the computer, you should remember how everything was originally connected, mark the wires or take a picture.
3. It should be noted that a small amount of static electricity is sometimes collected in the hole where the mains plug is connected. It can be removed by simply touching three open contacts. It can give a little electric shock, but it doesn’t hurt, and even more so, it’s not fatal (after all, you have already turned off the power from the mains).
4. Next, unscrew the bolts from behind that hold the side wall of the system unit. After unscrewing the bolts, remove the cover. It is important here not to confuse the covers, otherwise, if you remove the one from which the motherboard is attached, in this case you will definitely not clean anything. If we look from the front, you need to unscrew the left side of the system unit.

5. Put the bolts in a jar or any other place, about which you will not forget that it was there that you put the bolts. Whoever has a latched body can skip this step.
6. We put the system unit on the right side, so that the motherboard is facing us. You can clean the computer from dust while standing, but when the system unit is lying, it is much more convenient.
7. Removes RAM from the system unit. And do not forget to remove the latches on the ends of the board. There may be one or two.


9. In addition, your system unit may also have a sound card, modem, etc. Most often they are located under the video card - we also get them.
10. After the above mentioned manipulations, turn off HDD(hard drive) and disk drive.
11. Lay out all the parts that you have removed carefully on the floor, preferably in the order in which you took them out. Knowing the order, it will be more convenient for you to install them back.
Stage two. Cleaning your computer from dust
1. We take a vacuum cleaner, plug it into an outlet, remove the tube and nozzle so that you only hold a hose with a handle in your hands. Some vacuum cleaners have special small plastic nozzles, we can use them.
2. We take the brush in the second hand and press the "Start" button. Not on a computer, but on a vacuum cleaner!
3. Next, slowly but surely, and most importantly, carefully clean the motherboard and the system unit with a brush. At the same time, we hold the vacuum cleaner tube five centimeters from the place where we brush. So, all the dust that rises with a brush will be sucked into the vacuum cleaner - this is one of the most important moments in cleaning a computer from dust.

4. You should also focus on cleaning the coolers themselves from dust and dirt, due to the fact that the bulk of the dust is collected there. At the same time, the vacuum cleaner tube must be inserted close to the cooler, then it starts to spin, and the dust located there is sucked out from there. There is a grate on top, and we can not be afraid that cleaning from dust will damage one of its blades.
5. ATTENTION! Be careful when holding the vacuum cleaner tube near the system boards, as you can not hold the tube and it will stick to the board. course components motherboard the tube will not suck, but a slight blow may result. Even such a blow can cause damage to a fragile board. You have to be careful with this. Do not bring the vacuum cleaner tube too close.
7. After that, we start drawing, where the very simple pencil from your arsenal will already be used. You will need it for the following: the point here is that the contacts - those sections of the boards that are directly inserted into the motherboard connectors, sometimes have the properties of oxidizing, as a result of which the board is unstable, and sometimes it stops working altogether. Such cases are not uncommon when neither RAM, no video card. There is nothing terrible in this, you need the most accurate cleaning from dust.
Let's get back to drawing. We take the board in our hands, and as gently as possible on both sides we sketch the contacts (ribs) with a simple pencil. Definitely gentle and gentle. So, as if you were given an engraving by a famous Italian Renaissance artist for restoration. This simple procedure allows you to get rid of the oxide on the contacts.
8. Then we take the eraser, and again gently and gently erase the drawing. In this case, do not press hard with the eraser so that there is no rubber left on the contacts. If it still remains, you can simply wipe it off with clean hands.

Everything, now at this simple stage, cleaning the computer from dust is completed, and you can already proceed to the following steps.
Stage three. Reassembling the computer after dusting
After we cleaned the computer from dust, we assemble our clean system unit into a single whole. At the same time, we do everything as when disassembling, only in the reverse order. All components are connected to the system unit. It should be assembled very carefully, so that everything is installed in its place and in its connectors. In this case, hands must be clean or in gloves.
We press the "Start" button, now the computer, and rejoice. After all, the cleaning of the system side from dust is finally completed.
- It is undesirable to place the system unit against the wall itself. It will be enough 5 centimeters from the wall. This is necessary for normal ventilation and to prevent overheating of the processor.
- When you once again do wet cleaning in the room, you should definitely wipe it behind the system unit, as a lot of dust collects there. Moreover, systematic wet cleaning after the system unit reduces the accumulation of dust inside it.
- Cleaning the computer from dust should be carried out at least once every six months.
Summing up, let's remember for ourselves that ordinary dust can cause serious malfunctions in the process of computer operation. It is collected inside the system unit, which all leads to the fact that your computer starts to freeze, slow down, various kinds of errors appear, and so on. Often, accumulated dust even leads to a sudden shutdown of the computer.
In this article, we told you how to clean a computer from dust, and what you need to have and be able to do for this, and also showed what steps the cleaning of a computer from dust and dirt consists of.
If you have any difficulties in cleaning your computer from dust, you can always contact the center computer help website. The masters of our service will do a complete and professional dust cleaning of your system unit and give valuable recommendations on how to protect your computer from dust in the future.
call the master
All users personal computers sooner or later they encounter a situation where the computer starts to slow down or ends free place on the "C" drive. This is a clear sign that it is time to clean the computer of junk and unnecessary files, otherwise, very soon the computer will start to work unstably or simply stop loading. In this article, we will consider in detail how to correctly use some kind of program clean your computer.
There are many programs with which you can clean up your computer. Programs such as "Norton Utilities", "WinUtilities", "TuneUp Utilities" clean and optimize the computer system well, but for a simple user they will seem too complicated.
In our example, we will look at how to clean the computer using the program "Ace Utilities", it's easy to use and does a good job.
First you need to download it somewhere, for example, type the phrase R12 in the Yandex search bar; "download Ace Utilities rus" and get many results where you can download this program.
So we installed the cleaner program and now let's start cleaning the computer itself
First, a window will open for creating a restore point in order to restore the system in case of any failures, but in my practice this has never happened. “It's like the non-Russians say R12; Plan b"
 Do not touch anything here and click "Next"

So, the restore point is created, click "Finish"
And here is the main window of the program for cleaning our computer

On the left, select the inscription "Cleanup" and on the right, click on "Clean up junk files"
 In the window that opens, in the upper left corner, click on the binoculars. Scanning for junk files starts. The scan may take several minutes depending on the performance of your computer. It will seem that the computer is frozen, but it is not, you need to wait until the end of the computer scan

After the computer scan is over and the program finds all unnecessary files (garbage), click the "Delete All" button, i.e. "Delete everything". Do not be afraid to press, nothing extra will be deleted, these are temporary files left over from when installed games or programs that will never be needed. After deleting unnecessary files, the window will automatically close.
 The removal process has started
Now we need to clean the system registry. The registry stores the settings for all operating system Windows and all programs installed in it
 Select "Registry Cleaner"
 In the upper left corner, click the "Scan" button. Scanning can also last quite a long time from 2 to 15 minutes.
 After scanning is complete, click the "Remove All" button. Everything, the registry is cleared of garbage. This will affect the speed and loading of your computer.
 Now you need to select the "Remove Invalid Shortcuts" tab
 Again, press "Binoculars" and scanning begins
 After scanning, we see all unnecessary shortcuts, there can be a lot of them. I recently did a cleanup on my computer, which is why I have so few of them. Click the "Delete" button as shown in the picture above

Click the "Yes" button, thereby agreeing to the removal of incorrect labels
The next stage of cleaning and optimization is R12; Registry defragmentation.
 On the left, select the item "Optimization" and on the right "Registry Defragmentation", i.e. let's put the register in order.

Defragmentation can take a very long time from several minutes to half an hour depending on the performance of the computer, so it may seem. that the computer is frozen, but it is not. It is necessary to wait until the end of the program and the opening of the window as in the picture below.

Here is the defragmentation completed. Click the "Finish" button, and the computer should restart itself.
There remains the last stage of cleaning the R12 computer; This is hard disk defragmentation, also a very important step in optimizing your computer. It greatly affects the speed of opening programs.
To defragment the hard drive, click the "Start" button
 select "All Programs"
 Next, select the folder "Standard"
 In the "Standard" folder, select the "Utilities" folder
 In the folder "Utilities" we find the program "Registry Defragmenter", run it.
 In the program that opens, select the disk that we want to defragment, the main disk is drive "C", it contains the entire operating Windows system, so it needs to be defragmented first. I have three disks, and you can have both 2 and 1, depending on how you were set up in the store where you purchased your computer.
After you have selected the disk, press the "Analyze Disk" button or you can immediately click on the "Defragment Disk" button R12; in this case, the analysis will occur automatically.
Defragmenting in general can take half a day depending on the size of the hard drive, so if you do it, don't be surprised if it takes a very long time.
Here we actually cleaned our computer.
No related posts
During the operation of the operating system, a huge amount of unnecessary junk files accumulate, which not only take up space, but also often slow down the system. Therefore, periodically it is necessary to clean the system, for which it is necessary use not only standard utilities, but also third-party tools.
Use of regular funds
First of all, you need to clean the disk from unnecessary junk files. For this we go to My computer, and go to properties drive C by right-clicking on it.
Immediately on the first tab, click on the button " Disk Cleanup". For some time the PC will analyze information, after which it will display a window in which it will scroll resources that can be cleared. Everyone gets here reports OS, basket, temporary files Internet browsers, etc. Depending on the littering of the system, in this way it is possible to free from several megabytes to tens of gigabytes. 
You can also check system files , for which it is enough to press the cleaning button at the bottom of the window. The OS will analyze again and issue a list of system files available for deletion.
It should be noted that in this way delete restore points system, so you need to be very careful.
Cleaning in Windows 10
The instruction that we have provided above is available on all Windows versions 7, 8, 8.1, 10. But in the Tenth version there are a number of additional features.
First of all, these are the settings of the item “ storage". To get there, you need to go to options, where to select the section " System». 
Here you can set settings saving some elements of the system by default, as well as see volume occupied and free space.
In addition, the system provides possible viewing detailed statistics, for which it is enough to click on any local disk from the list. 
If you scroll to the end of the list, you can find items cleaning temporary files, folders downloads, and baskets.
Cleaning up junk files
To get rid of unnecessary files on a PC, it is not necessary to use standard utilities, you can use specialized software that will simplify this procedure. There are a lot of programs for this purpose, but we will take for example Ace Utilities.

Removing unused programs
Now let's start removing unnecessary applications. For this purpose, it is not necessary to use third-party software, but it is enough to use standard removal utility. You can find her in control panels. Since Windows 7 it is called . 
When the list is loaded, you need it analyze.
You should immediately enable sorting by size and check if applications are needed very big size. If they are not used, then delete them. Then sort by installation date to see the oldest programs. Perhaps some of them are no longer needed.
Attention! If the name of the application is unfamiliar, then you should look on the Internet for what it does. Perhaps it important component system or a driver whose removal will render the system unusable.
Removing duplicate files
Users who store a large amount of music and photos on their computer are advised to search for duplicates, to delete identical files, which can be in different folders.
For example, let's take the application Glary Utilities, although you can use any program, there are a lot of them on the Internet.
We launch application, and in the utility selection window we find Removing duplicates.
Then we set the necessary options(search by name, size and search location). Press the button " Scan» to start the process. The search can take quite a long time, depending on the number of elements. 
Free space analysis
After all the manipulations done, you can scan the disk to determine what and how much space is taking up. To do this, you can use the utility winDIRStat. The program is completely free And Russified.
It will show you which folders and files are taking up disk space in a visual way. Field of what can be produced manual removal unnecessary files. The main thing is not to overdo it and do not delete important system files and components when cleaning, otherwise you can damage the operating system. 
And this time I will tell you how to manually remove computer garbage yourself, using Windows Tools and programs.
1. Where is garbage stored in operating systems
On Windows XP
We go and delete everything in the folders: Temporary Windows files:
- C:\Documents and Settings\username\Local Settings\History
- C:\Windows\Temp
- C:\Documents and Settings\username\Local Settings\Temp
- C:\Documents and Settings\Default User\Local Settings\History
For Windows 7 and 8
Windows temporary files:
- C:\Windows\Temp
- C:\Users\Username\AppData\Local\Temp
- C:\Users\All Users\TEMP
- C:\Users\All Users\TEMP
- C:\Users\Default\AppData\Local\Temp
Browser cache
Opera cache:
- C:\users\username\AppData\Local\Opera\Opera\cache\
Cache muff:
- C:\Users\username\AppData\Local\Mozilla\Firefox\Profiles\ \Cache folder
Google chrome cache (Chrome):
- C:\Users\ username \AppData\Local\Bromium\User Data\Default\Cache
- C:\Users\User\AppData\Local\Google\Chrome\User Data\Default\Cache
Or we drive in the address chrome://version/ and see the path to the profile. There will be a folder Cache
Temporary internet files:
- C:\Users\username\AppData\Local\Microsoft\Windows\Temporary Internet Files\
Recent Documents:
- C:\Users\username\AppData\Roaming\Microsoft\Windows\Recent\
Some folders may be hidden from prying eyes. To show them, you need .
2. Cleaning the disk from temporary and unused files using
Standard Disk Cleanup tool
1. Go to "Start" -> "All Programs" -> "Accessories" -> "System Tools" and run the "Disk Cleanup" program.
2. Select a drive to clean up:
The disk scanning process will begin...
3. A window will open with information about the amount of space occupied by temporary files:

Check the boxes next to the partitions you want to clear and click OK.
4. But this not all. If you did not install Windows 7 on blank disc, and on top of the previously installed operating system, you probably have such space-consuming folders as Windows.old or $WINDOWS.~Q.
In addition, it may make sense to delete system restore checkpoints (except the last one). To perform this operation, repeat steps 1-3, but this time click "Clean up system files":

5. After the procedure described in paragraph 2, the same window will open, but the “Advanced” tab will appear at the top. Go to it.

Under System Restore and shadow copy» Click Clear.
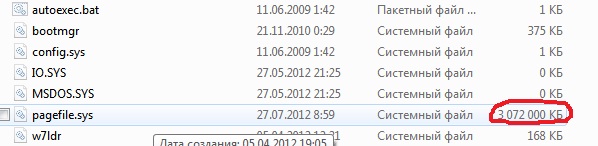
3. Files pagefile.sys and hiberfil.sys
The files are located in the root system disk and take up quite a lot of space.
1. The file pagefile.sys is system paging file(virtual memory). It cannot be deleted (it is not recommended to reduce it either), but it can and even needs to be moved to another disk.
This is done very simply, open "Control Panel - System and Security - System", select " Extra options system" in the "Performance" section, click "Settings", switch to the "Advanced" tab (or press the key combination win + R, the command will open and type SystemPropertiesAdvanced there) and in the section " Virtual Memory» Click Edit. There you can choose the location of the paging file and its size (I recommend leaving "Size at the choice of the system").
4. Removing unnecessary programs from the disk
Good way to free up disk space (and as an added bonus to increase system performance), this is to remove unused programs.

Go to the control panel and select "Uninstall programs". A list will appear from which you can select a program. which you want to delete and click "Delete".
5. Defrag
defragmentation of the hard disk, carried out by the defragmenter program, allows you to organize the contents of the clusters, that is, move them on the disk so that clusters with the same file are placed sequentially, and empty clusters are merged.
This leads to an increase in the speed of access to files, and hence to some increase in the speed of the computer, which, when high level Disk fragmentation can be quite noticeable. The standard disk defragmenter program is located along the path: start> all programs> standard> system utilities> disk defragmenter.

This is what the program looks like. In which you can analyze the disk, where the program will show a diagram of disk fragmentation and tell you whether or not you need to defragment. You can also set a schedule for when the disk will be defragmented. This is a program built into Windows, there are also separate disk defragmentation programs, for example, which you can download here:

Its interface is also quite simple.

Here are its advantages over standard program:

- Analysis before disk defragmentation.
- Do a disk analysis before defragmenting. After the analysis, a dialog box is displayed with a diagram of the percentage of fragmented files and folders in the disk and a recommendation for action.
- Analysis is recommended to be carried out regularly, and defragmentation only after the appropriate recommendation of the disk defragmenter. Disk analysis is recommended to be performed at least once a week. If the need for defragmentation is rare, the disk analysis interval can be extended up to one month.
- Analysis after adding a large number of files.
- After adding a large number of files or folders, the disks can become excessively fragmented, so it is recommended to analyze them in such cases.
- Checking for at least 15% free disk space.
- For a complete and proper defragmentation using Disk Defragmenter, the drive must have at least 15% free space. Disk Defragmenter uses this volume as an area for sorting file fragments. If the amount is less than 15% of free space, then Disk Defragmenter will only perform partial defragmentation.
- To free extra bed disk, delete unnecessary files or move them to another disk.
- Defragmentation after installation software or Windows installation.
- Defragment drives after installing software or after performing an update or clean install Windows. Disks often become fragmented after software is installed, so running Disk Defragmenter helps ensure the best file system performance.
- Saving time on disk defragmentation.
- You can save some time required for defragmentation if you remove junk files from the computer before starting the operation, and also exclude from consideration the system files pagefile.sys and hiberfil.sys, which are used by the system as temporary buffer files and are recreated at the beginning of each Windows session .