Improving the image quality with the side buttons on the monitor is not always enough to make the indicator at the peak of a good display. The built-in calibration tool in windows 10 will allow you to make sure that your monitor can show much better. For content producers, the main thing is to make sure that the work will appear on other devices, the same standard in quality. For ordinary users, the viewing of movies and photos will be improved. Before calibrating the monitor in windows 10, reset the monitor to factory settings and turn off the lights in the room to avoid glare.
Where are the monitor calibration settings
1 way. Since Windows 10 is updated and the location of the settings changes all the time, I decided to add two ways to enter the monica calibration parameters.
- open" Options" and just in the search write " Monitor Color Calibration".
- After opening a new window, proceed to the bottom method "How to Adjust Colors Using the Color Calibration Tool".
2 way. Click right click mouse on the desktop and select "Display Options".

In the window that appears, click " Extra options screen".

So we come to the two parameters that we need: "Color Management", "Color Calibration". We will analyze these two parameters in detail below.

How to use color management in windows 10
To calibrate your monitor in windows 10, you need to use "color management", which shows the preset profiles for your monitor. The line "Devices" shows the profile of all connected devices to the computer and associated profiles. On the "All profiles" tab, all available profiles are displayed. Select multiple options to see how they appear. For truly accurate results, you can create color profile using the Color Calibration function.

How to Adjust Colors with the Color Calibration Tool
To adjust colors and calibrate the monitor in windows 10, you need to use the monitor buttons to adjust certain color aspects. Drag the welcome window to the calibration monitor. Even if you have multiple monitors of the same brand and model, they need to be configured individually each. Click next.

The wizard shows that gamma controls the amount of light emitted from a particular color. By clicking "next" you will be able to use the slider to adjust.

Achieve minimal visibility of small dots in the center of each circle, as the wizard tells us.

Brightness and contrast will be adjusted with your buttons on the monitor. Some monitors have buttons that directly adjust the brightness and contrast, while others will require you to enter the menu on the monitor and select these two options there. Click next to start setting up.

Adjust the brightness level so that the shirt does not blend into the suit, and the X is barely visible, as the wizard suggests.

Adjust the contrast to the middle picture as recommended.

With color balance, colors should not "bleed" into grays. Click next to adjust.

Drag the sliders to calibrate the colors.

Now you can switch between the previous calibration and the weaving one. If everything suits, click done, otherwise click cancel to cancel.

Troubleshooting that may occur
If the colors still don't look right, then most likely your video card has failed or the monitor needs to be replaced. Try connecting another monitor to your computer and check. If the problem persists, then you will need to replace the video card or check it by replacing it with another one. Properly calibrating your monitor in windows 10 can greatly improve the quality of work for photographers, videographers, graphic designers, and creatives. Improve the quality of images and computer games.
Calibration Windows monitor 10, 7 is the process of adjusting the color gamut of the screen. It allows you to significantly improve the ergonomics of image perception: the eyes are less tired, which is especially important for professional PC users. Designers and professionals computer graphics you need to know how to calibrate the monitor in Windows 10, 7 correctly in order to bring the image as close to the real one as possible.
The first time the procedure must be performed after purchase and connection of the display. In the future, it is repeated only when working with graphics, since the accuracy of the setting matters only in this professional field.
Using the instrument
An accurate result can be obtained using a monitor calibrator, a device for automatic calibration. It allows you to fine-tune everything important parameters. Consider the main characteristics of the DataColor Spyder5Pro model.
The principle of operation of the colorimeter is very simple: the user follows the instructions displayed on the screen. Within 5 minutes, you can set the desired values by choosing one of 16 options. When you start the program offers the best options. 
The function of automatic measurement of lighting will help to take into account the parameters of the external environment. Data on screen parameters and their analysis helps to find out the maximum capabilities of the device. A convenient counterweight helps to fix the device on the screen during calibration.

Software downloaded from the manufacturer's website. Upon purchase, the user receives a card with the address of the resource and serial number. Thus, the software is easily updated.

The pleasure costs 12,500 rubles.
Built-in tools
Windows 10 and 7 have a utility that helps you customize your display. Before starting, you need to set the working resolution. The program is launched only from under account administrator.
How to enable color calibration on Windows 10 step by step:


In Windows 7, the service works similarly.
Using special software
The Cltest monitor calibration program for Windows will help you install fine tuning display. You can download it using the button below.


The program is a little complicated for beginners, but it allows you to calibrate a laptop monitor for photo processing, which is not always possible with built-in tools.
Online Services
Let's talk about monteon as an example. The result of the work will be subjective - all values are set "by eye". Professionals rarely use such services, so how to calibrate the monitor screen (laptop or computer) to work in Photoshop or another graphics editor it will be difficult here.
Go to the site and click the "Start" button. 
Calibration is performed using the buttons of the monitor or laptop - they are different on each device. Tests will be presented step by step:

Go through all the steps in sequence and at the end a maximum quality image will be presented. If you see it well, then the laptop monitor screen colors are calibrated online Windows 10, 7 was successful. 
There is a monitor calibration check: wallpaper that can be downloaded here.
Download the image in the desired resolution and set as your desktop wallpaper Windows desktop. To do this, right-click on the file name. 
Another picture (photo) for calibrating the brightness of the monitor is shown below. 
- Set the screen contrast to 50%.
- Adjust the brightness so that the divisions on the light and shadow borders are clearly distinguished.
- In the middle of the table there should be a gray color without shades.
On the network you can find many similar verification files that tell you how to calibrate the monitor at home, any table is selected. Don't forget to download the description for it.
Windows 10 Touch Screen Calibration
Tablet owners Windows control 10 can calibrate the sensor. To do this, go to the settings. Do it through the search bar. 
- In chapter "Hardware and Sound" find your tablet settings.


Have a great day!
For ordinary people who occasionally turn on a computer or laptop in order to pass the evening with classmates or playing an online game, screen calibration is almost never required. They are satisfied with everything. But for those who are involved in the processing of photographs and video recordings, the question of how to calibrate their computer monitor is often very, very important. In the Windows 10 operating system, a separate tool has been made for this and you do not need to install any third-party programs.
So, in order to calibrate the monitor screen in Windows 10, you need to click the "Start" button and type the word "Calibration". The search results will include the Monitor Color Calibration tool. We select it.
Or, as an alternative, you can press the key combination Win + R, enter the command dccw.exe and click the "OK" button.
With this we will write down such a monitor setup wizard in Windows 10:
The first two windows are informational. We carefully read what is written there and click on the "Next" button.
To calibrate the screen on a laptop or PC, you will also need to go to the monitor settings menu.
The first step is to adjust the gamma. You will need to achieve the minimum visibility of small circles in the center of each circle by moving the slider on the left.
Then you need to adjust the brightness and contrast. If everything is in order with these parameters for your display, you can skip the step.
Otherwise, first adjust the brightness of the monitor:
Then - screen contrast:
If everything suits - click the "Finish" button. Congratulations - you managed to calibrate the monitor of your laptop or computer.
Advice: if you are satisfied with the quality of the text display, then in the last window, uncheck the box "Run the ClearType Customizer".
During the development of Windows 10, Microsoft has changed the familiar display options interface. It became simpler, which allowed users to produce various settings on an intuitive level. The determination of the optimal screen parameters occurs already during the installation of the system in automatic mode. It remains only to configure them for specific user if the need arises. The set parameters must correspond to the maximum capabilities of the display screen and video adapter. This achieves the most accurate rendering of graphics and colors.
Screen resolution setting
Setting up the screen on a personal computer, tablet or laptop with Windows 10 is not a big problem for any user. Its interface is simple and intuitive, which allows you to modify the screen as you wish in a few clicks. To make a setting:
- Click on the "Settings" icon. From the Start menu, click on the Settings icon
- Click on the "System" icon in the "Settings" window.
 In the "Settings" window, click on the "System" icon
 - Open the Display tab.
 View your screen options
 - Check your screen resolution. It must match the recommended resolution of the device.
- If the permission is set correctly, then click on the "Properties" button graphics adapter».
 Click on the "Graphics Adapter Properties" button
 - Make sure that your adapter is selected in the "Adapter Type" tab.
 Check if the video adapter is installed correctly
 - Close the Graphics Adapter Properties by clicking the OK button.
- Change the screen resolution if necessary.
- Close the System Options window.
- Screen setup is complete.
Other screen parameters can be configured as needed.
When installing Windows 10, all screen settings are usually configured automatically. The exception is rare or obsolete types of video adapters whose drivers are not in the database on Microsoft servers. In this case, the driver is downloaded from the manufacturer's website or installed from optical disc, which is attached to a computer or laptop when sold. It contains distributions of all drivers for installed devices.
Video: How to change the screen resolution on a computer, monitor or tablet with Windows 10
Increase or decrease screen brightness and contrast
Brightness and contrast are among the main screen settings. Each user adjusts them individually to his own requirements.
Contrast on laptops and tablets adjusts automatically. On monitors and displays personal computers there is a Menu button with which you can adjust the contrast using the device menu.
There are several options for changing the screen brightness settings that you can apply.
Changing screen brightness in system settings
There are two ways to access screen options:

Video: How to change screen brightness through Windows 10 settings
Changing screen brightness using the keyboard
Virtually all modern types keyboards, it is possible to change the brightness of the screen without resorting to system settings. Previously, only laptops had this feature, but now this feature is also inherent in many types of personal computer keyboards. As a rule, you can change the brightness using two keys, which are marked with a sun icon and an arrow, indicating an increase or decrease in brightness. They are most often found in the upper or lower case of the keyboard.
 Adjust the brightness level of your screen with the keys
 In some cases, to change the screen brightness, you need to press the Fn key along with these keys.
If the keys do not respond to commands to change the brightness, download and install the keyboard driver from the manufacturer's website.
Change the screen brightness through the "Notification Center"
In the "Notification Center" you can set the screen brightness level only in fixed positions. To change the brightness level, follow these steps:

Changing screen brightness using the battery indicator on the "Taskbar"
Laptops and tablets have a battery indicator on the Taskbar, which can also be used to change the brightness of the screen:
- Click the left mouse button on the battery charge indicator.
 Click on the battery indicator
 - Click on the screen brightness tile.
 Adjust the screen brightness level
 - You can change the brightness level by fixed values from 0 to 100% in 25% steps.
- Click on the "Power and sleep settings" tab.
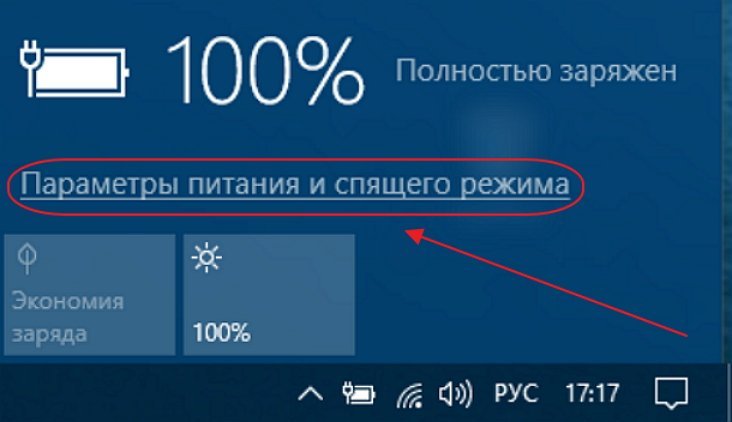 Click on the "Power and sleep settings" tab
 - Click on the line "Advanced power settings" in the right side of the opened "Settings" window.
 Click on the "Advanced Power Options" tab
 - In the "Power Options" window, set the desired brightness using the "Screen Brightness" slider.
 Adjust the screen brightness level using the slider
 - Click on the Power Scheme Settings tab.
 Click on the Power Plan Settings tab
 - In the "Change scheme parameters" panel that opens, use the "Adjust brightness" slider to achieve its optimal level when powered from the mains and from the battery.
 Adjust brightness on mains and battery power
Changing Screen Brightness Through the Start Menu
You can also use the Start key to navigate to the screen brightness settings panel. To do this, do the following:

What to do if the screen blinks
Frequent screen blinking in Windows 10 can be caused by two problems:
- usage outdated drivers video adapter;
- incompatibility installed on the computer software application and system requirements.
The problem is not as common as it was when Windows 10 just started rolling out.
This is due to the fact that the main companies that produce components for computers have brought their software applications to the required parameters. On those computers where video adapters manufactured 6–7 years ago are installed, incompatibility may occur, since their drivers were developed without taking into account modern requirements.
To fix the error, you need to find out if the driver or software application is the source that creates the screen blinking. For problem solving and recovery normal operation screen and video adapter, you must use the following method:
- Right-click on the "Taskbar".
- Click on the "Task Manager" line.
 In the menu, click on the line "Task Manager"
 - Check for blinking in the Task Manager panel. If the panel blinks along with the screen, then the reason is the old video adapter driver. If this does not happen, then the reason is in one of the installed software applications.
 Check for a Blinking Task Manager Panel
 - Double click on the Control Panel icon on the Desktop.
 On the Desktop, double-click on the Control Panel icon
 - Click the Administrative Tools icon in the All Control Panel Items window.
 Click on the "Administration" icon
 - Double-click Computer Management in the Administrative Tools window.
 Double click on "Computer Management"
 - Expand the Event Viewer tab in the Computer Management window.
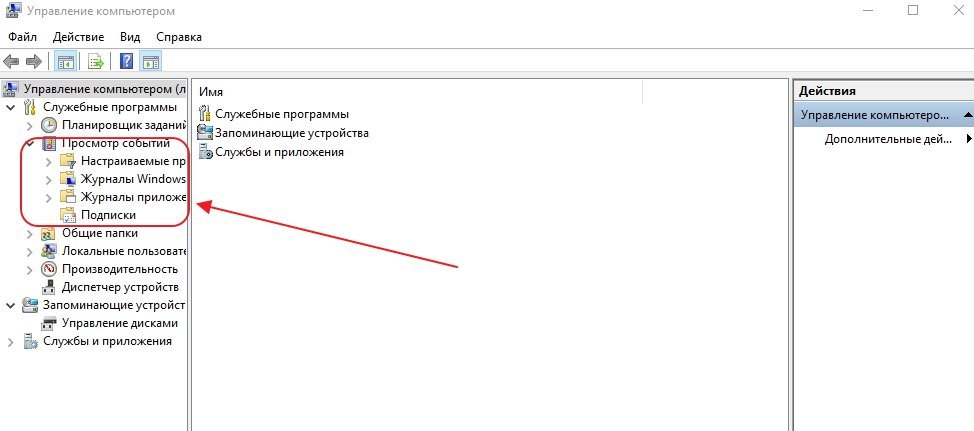 Expand the Event Viewer tab
 - Expand the " Windows logs».
 Expand the "Windows Logs" directory
 - Check the Application and System tabs for errors.
- If a software application compatibility error is found in the Application tab, then delete it. Then download the latest version of the application from the developer's website and install it on your hard drive.
 Click on the "Application" tab and check for errors
 - If an error in the System tab indicates that an updated video adapter driver is needed, then follow the same steps for the replacement as you would for the software application.
 Click on the "System" tab and check for errors
Video: How to update video adapter drivers in Windows 10
What to do if applications or games do not open in full screen
All modern programs automatically adjust to the screen size. If you install an application or game that was developed many years ago for older editions of Windows, then they can unfold in a reduced size. In this case, it becomes necessary to expand them to full screen. There are several ways to solve this problem:
- Using hotkeys:
- press the Alt and Enter keys on your keyboard at the same time;
- the application will expand to full screen;
- when you press the keys again, the application will return to its previous state.
- Change launch options:
- right-click on the icon of the game or application on the "Desktop";
- select "Properties" in the drop-down menu;
 In the drop-down menu, select the line "Properties"
 - in the panel that opens, click on the "Compatibility" tab;
 Click on the "Compatibility" tab
 - press the "Run the Compatibility Troubleshooter" button;
 Click on the "Run the Compatibility Troubleshooter" button
 - if the application does not expand to full screen, then check the box "Compatibility mode" and select the required edition of Windows from the drop-down list. It must be borne in mind that Windows edition 10 is missing from the list. The last one on the list will be Windows 8.
 Select the edition of Windows you need
 - click the OK button.
- Update video adapter drivers:
- determine the model of the video adapter in the "Device Manager";
- go to the manufacturer's website;
- download and install the new driver.
- Changing the graphic settings of the game:
- start the game;
- enter settings;
- find the item for changing screen settings;
- set the full screen mode;
- restart your computer.
- Screen resolution change:

If a game or application requires a screen resolution of 640X480, then you can set it in the "Parameters" block on the "Compatibility" tab. But it must be a very old game or application that was created during the appearance of Windows in the software market.
Video: How to Run an App in Compatibility Mode on Windows 10
Touch screen calibration on Windows 10 tablets
Calibration touch screen must be performed for an adequate response of the tablet to the touch of your fingers. If the device is not calibrated, then instead of the pressed letters, others will appear on the screen or the image will turn one hundred and eighty degrees.
To calibrate the touch screen, follow these steps:

Disabling the screen from turning off or dimming
If there is no activity for a long time, the display screen will go blank after a certain period, and after a few minutes the computer will go into sleep mode, turning off completely. In the system settings, you can set the option when the sleep mode and screen dimming will be turned off. To turn off the power-saving mode, you need to perform a number of operations:
- Click the left mouse button on the "Start" button.
- Open Options.
- Select the "System" section.
- Click on the "Power and sleep" icon.
- Click the "Advanced Power Options" button.
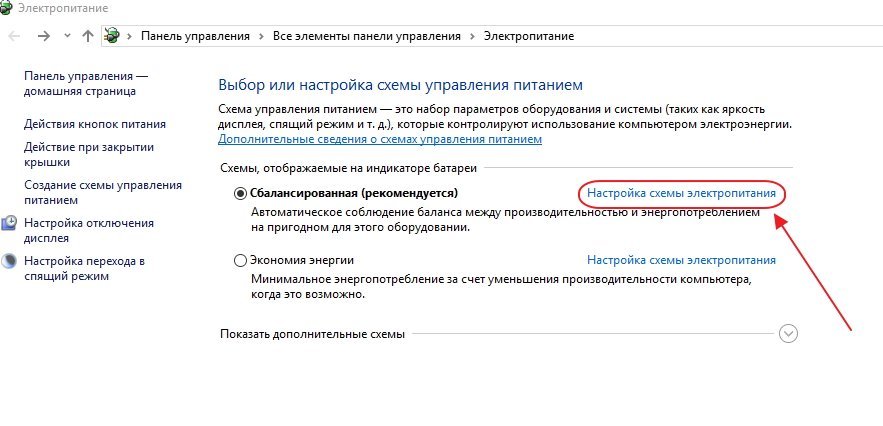
- In the Power Options window, click the Set Power Plan button.
 Select "Power plan settings"
 - In the Turn off display line, turn off screen dimming when working on mains or on battery power. To do this, select "Never" in the drop-down lists.
 Select "Never" from the dropdown list
 - Similarly, in the fields next to the "Put the computer to sleep" icon, turn off the transfer of the computer to the off state.
 In the drop-down list, click on the item "Never"
 - Click Save Changes.
Video: a non-standard way to disable screen dimming
One of the main criteria GUI brightness, contrast and color gamut are considered. The more clearly the display of graphic objects looks, the more comfortable the work for the user will be. Therefore, do not neglect spending a few minutes in order to achieve the maximum effect when displaying graphics and text documents. It should be remembered that wrong setting screen settings also affect the user's visual apparatus and may lead to a gradual deterioration of vision. You can use the methods in this article to adjust the screen and fix minor problems with the image. If they do not lead to the desired result, then you should contact the specialists of the service center.
Hello! We continue to disassemble the Windows 10 operating system! Today you will learn how to enable and configure the touchpad on Windows computer 10. To customize touch panel, open the Start menu at the bottom left of the screen. In the window that opens, click on the Options tab or icon.


You can customize:
You can enable or disable the touchpad on your computer.
You can enable or disable the touchpad when a mouse is connected.
You can enable or disable touch on the touchpad.
You can enable or disable two-finger drag to browse.
You can turn zoom on or off with the two-finger pinch gesture.
You can enable or disable double-tap instead of right-clicking.
You can enable or disable double tap and drag.
You can enable a touchpad action similar to clicking the right mouse button. You need to click on the lower right corner of the touchpad.
You can select functions for three-finger touch.
You can select objects for three-finger drag and slide.
Do you have any questions? Write a comment! Good luck!
touch Windows panel 10 enable configure updated: January 13, 2017 by Ilya Zhuravlev
info-effect.ru
What is multitouch and calibration
If we say what a multi-touch in a tablet is in ordinary words, then this is its ability to recognize several touches at the same time. So, the first tablets were with resistive displays and could understand only one touch (+ there was an imitation of the second). True, this is also considered multi-touch. After the advent of capacitive models, the possibility of multi-touch appeared. At first, there was an understanding of only two touches, and now their number reaches 10.


Why do you need Multi-Touch?
- Device management
- Games and entertainment
- Special applications
In the system, multi-touch is used to control widgets and other system applications. Much more feature implemented in third party applications. For example, Google Maps perfectly demonstrates the possibilities of multitouch. With just two fingers, you can go anywhere on Earth.

Interesting technology implemented in Windows systems. You can program gestures for yourself. That is, to give each movement almost any function or option.
But in games, multi-touch reveals its full potential. They often use a joystick, on which you need to press several buttons at the same time. For example, let's take the game Mortal Combat, where you need to press various combinations of buttons to achieve certain strikes, their series and fatalities.

How to test Multi-Touch?
How to check multitouch on a tablet? Checking multitouch is easy. There is a primitive way. Right at the inspection site, start the camera and take a picture. Open it and, spreading-shifting two fingers on the display, see if the picture is increasing / decreasing.
To check for more than 2 touch points, download one of the special programs. For example, Multi-Touch Tester. It is small and immediately determines the number of possible touches. In addition, you can personally look at the result by touching the display again.

Tablet Display Calibration
Calibration is needed in order for your gadget to adequately respond to the touch of your fingers. An uncalibrated device behaves as follows. For example, you write SMS, press the letter "A", and the display shows the letter "K" or "E". Not very convenient, right?
Calibration in Windows
Since the tablets contain several Windows options, then there are several ways to calibrate the screen. Rather, there are several ways to get into special application for this. In defective Windows ( Windows type 8 CP) you need to open the general settings. Almost at the very bottom of the window there will be a treasured button. In full versions, the option is in screen personalization.


How to calibrate an Android tablet
IN Android devices(not all) the option is located in the "Display" section of the Gadget Options and is called "horizontal calibration". After opening the application, follow its instructions. More and more new devices no longer have this option, apparently focusing on iOS.
Calibration in iOS
As you understand, there is no such option in iOS, as the developers claim that there is simply no need for it. In fact, any device, no matter how it was calibrated at the factory, tends to get upset. Many factors influence this.
What is multitouch in a tablet: Video

It's easy to say thank you - click on any of the social media buttons
kingdia.com
Screen calibration. How to calibrate your monitor on Windows or Mac |
Monitor calibration is very important for your laptop or computer, modern desktop OS, like Windows and Mac OS X, offer built-in tools to calibrate your monitor's brightness, contrast, gamma, and color levels. This can improve the readability of text on the screen, as well as give images and videos more natural colors.
Of course, professional digital photographers will want to use colorimeters for this. But if you do not have such a tool at your disposal, and you just want to make small adjustments, you can rely on your own eyes.
Before proceeding with the adjustment, make sure you are using the native resolution of your monitor.
If your monitor is equipped with adjustment buttons, you can use them. However, it is difficult to adjust the options without any guidance. Use test pages Lagom for LCD monitors (or similar tool) and get test images that you can refer to while calibrating multiple settings. Check out each page in turn. There you will find instructions explaining what you need to pay attention to when setting up various monitor options.
Suppose you are working on a laptop, and there are no such buttons on it. Then you have to turn to the tools built into Windows and Mac OS X.

Windows 10, 8.1, 8 and 7
Windows has a built-in screen calibration tool since Windows 7. To launch it, open the Control Panel. In Windows 10 or 8.1, this can be done by right-clicking on the Start icon and selecting Control Panel.
In the Control Panel window, click Hardware and Sound, then Display, and then click the Color Calibration link on the left side of the page.
Alternatively, you can open the Start menu, type "calibration" into the search bar, and click the "Calibrate Monitor Colors" shortcut to launch the calibration tool directly.

The Screen Color Calibration tool appears on the screen. It will help you change various options such as gamma, brightness, contrast and color balance, explaining what each setting means and how to adjust it. The Windows developers have done a good job, so just follow all the instructions on the screen.


Mac OS X has its own built-in screen calibration tool. To open it, click on the Apple menu at the top of the screen and select " System settings". Then, in the list that appears on the screen, click on the "Monitor" item.
In the window that opens, go to the "Color" tab and click on the "Calibrate" button.

An application called Monitor Calibrator Assistant will open. This utility guides you through the monitor calibration process, telling you everything you need to know and explaining how to properly set each option. Different options may be available for different monitors. The assistant will tell you what to look for while setting them up.
In the control panels of modern desktop environments linux desktop screen calibration tools may also be available. Of course, if you're using a Linux desktop computer, you can download the calibration guide web pages and do it manually using the buttons on the monitor itself.
Chromebooks and Chromeboxes do not have built-in screen calibration tools because they are simply not integrated into Chrome OS. However, if you are working with similar devices via an external monitor, you can use the above web pages and change the options manually using the buttons on the monitor.